How to Set Up Your Printer
Mini Photobooth works with all printers that support AirPrint.
Look at your printer manual to confirm, or search for your printer here
https://mfi.apple.com/account/airprint-searchTo connect to your printer:

Your iPad/iPhone and printer must be on the same Wi-Fi network
or, if your printer has its own Wi-Fi point, then you can turn that on, and connect your iPhone/iPad to the printer's Wi-Fi point.
Paper size

The print size depends on what paper is loaded into your printer. All 4x6 templates should fit exactly onto 4x6 paper if 4x6 paper is loaded.

2x6 templates will by default print doubled up (duplicated side by side) onto 4x6 paper with a cut line in the middle. You can change this setting in the Printer Settings screen.

All photos will print full bleed (edge to edge) if your printer supports it.
Setting a default printer
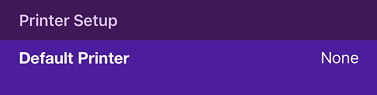
By default, the Apple dialog asking you to select a printer will pop up every time you print.
To avoid this dialog, select your default printer in Printer Settings, and Mini Photobooth will try to connect to this printer in advance.
Recommended Printers
There are many printers that work well (and really, any AirPrint printer will do), but if you don't already have something, these are 2 printers that we test and work with extensively, that we like. The Canon Selphy (1200 to 1500) is a great option for a casual photobooth. It's very affordable, super easy to carry, and has good photo quality. Its main downside is that printing can be slow.
If you're a professional photobooth operator, we recommend the DNP DS-RX1HS. It prints exceptionally quickly, with great quality and the cost per print is low. However, it's a beast to lug around, and is expensive.
So it all depends what your plan is. If you're a casual DIY user, we definitely recommend the Canon Selphy to start. If you are a beginning photobooth operator, we also recommend the Canon Selphy to start, to get a feel for the business first before a bigger investment. Then if you want to upgrade your photobooth equipment down the road, you can get the DNP DS-RX1HS later, and have the Canon Selphy as a backup printer for events.
Canon Selphy 1500
Casual- Affordable (~$150)
- Easy to set up
- Offers direct connection option with its own Wi-Fi point (good for venues with no WiFi)
- Easy and light to transport
- Can print full bleed (edge to edge)
- Printing can be slow (up to 2 minutes per picture)
- Network connections can be unreliable
(These are Amazon affiliate links, feel free to search for better deals!)
DNP DS-RX1HS
Pro- Very fast printing (10-20s per picture)
- Professional photo quality
- Can print full bleed (edge to edge)
- Can do doubled up 2x6 photo strips and handle cutting
- More expensive (~$700)
- Does not support AirPrint by default, you need to purchase a WCM Plus to connect the printer to AirPrint ($230)
- Heavy to transport, need to be careful
(These are Amazon affiliate links, feel free to search for better deals!)
How to Print & Auto Cut 2x6's on your DNP
With the DNP RX1HS and the WCM Plus, the way to enable 2x6 cuts is the following. The DNP DS620 should work the same way.
- Connect to the WCM access point on your computer or mobile device as your Wi-Fi network (For example WCMPLUS-8d4, yours should be similar).
- Go to the WCM Portal 192.168.4.1 (yours should be similar).
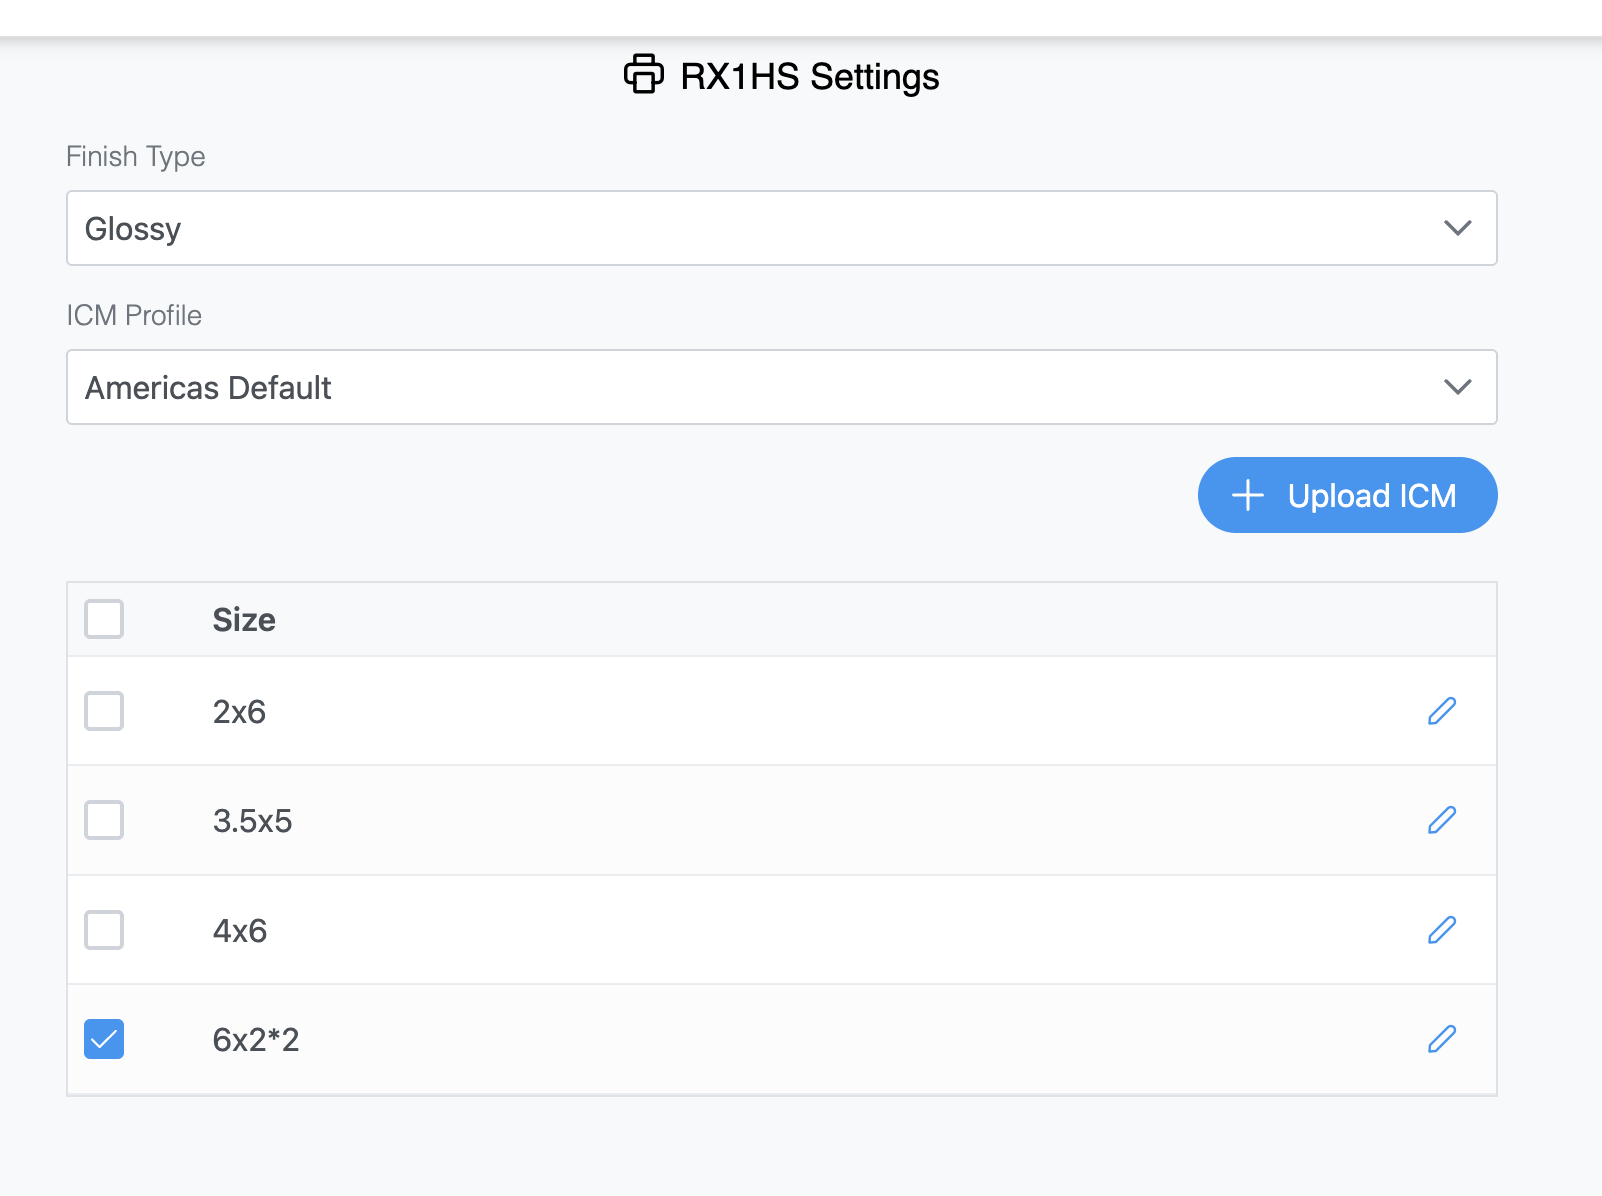
- Select your printer, then go to Printer Settings. Select 6x2*2, and tap the Save icon on the bottom right (very important!).
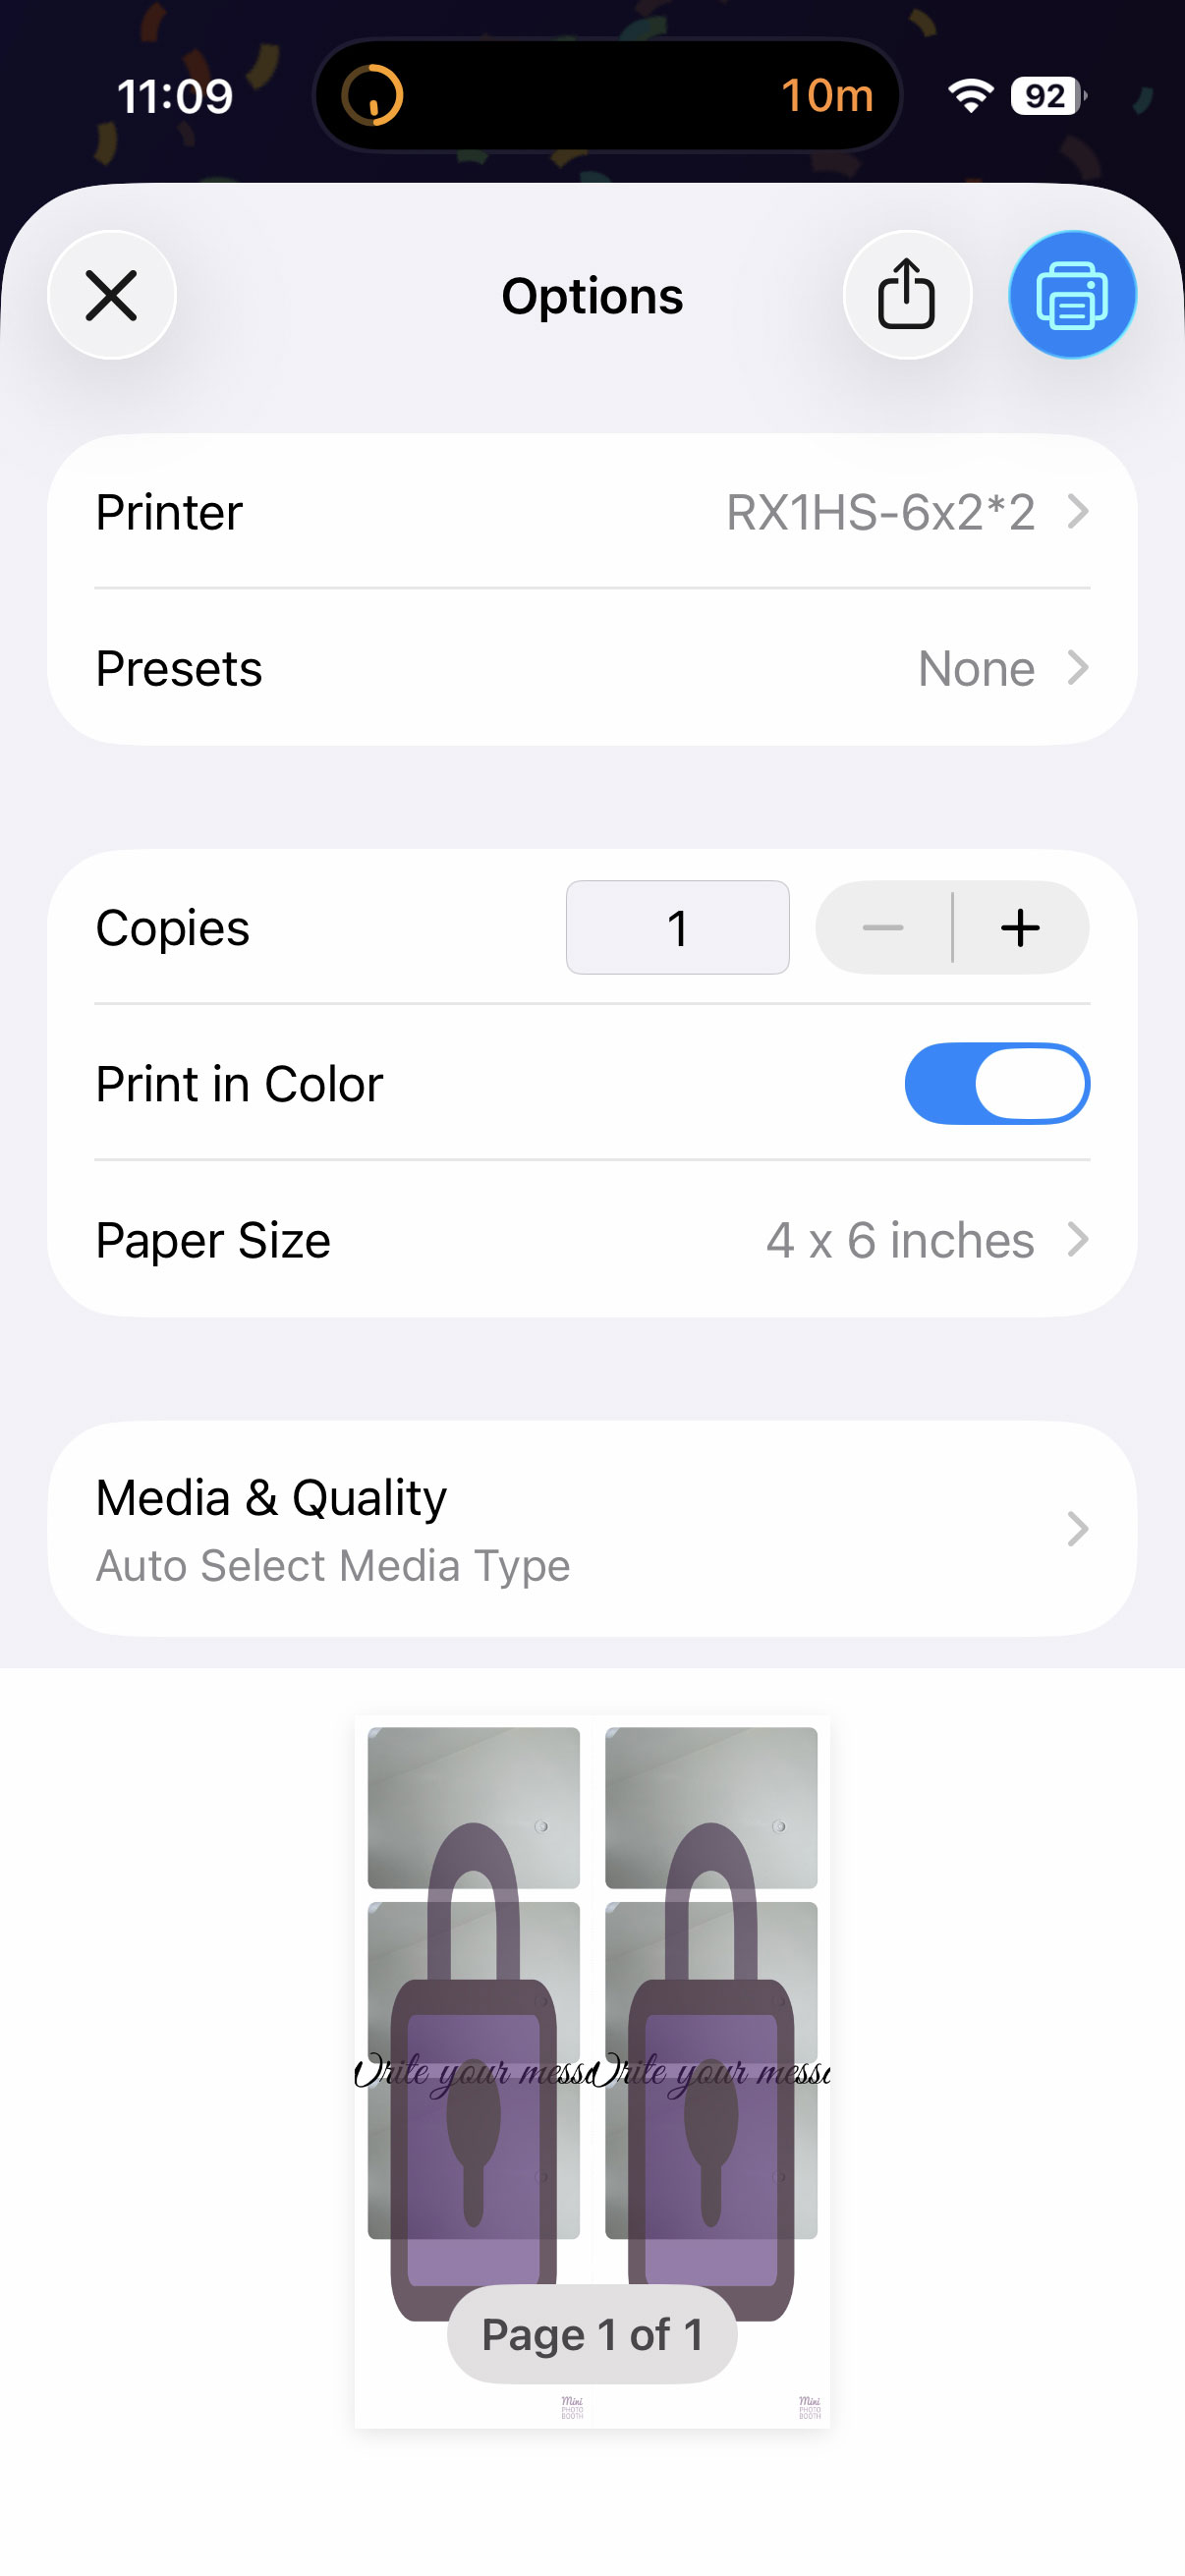
- In the app, when you go to print make sure you choose the printer that says RX1HS - 6x2*2 ← very important! Use your printer name instead, but it MUST say 6x2 * 2.
If you're using the DS620 with the WCM, the steps should be the same, just replace it with your printer name. Here are some screenshots of how it's supposed to look:
On the WCM portal:
In the app when you tap print:
Seeing your jobs in the iOS Print Center
When you print, Mini Photobooth hands the image off to the iOS Print Center. From there, iOS itself is responsible for sending the job to your printer. That means if a print is stuck, slow, or not coming out, the Print Center is the best place to see what's actually happening to your jobs — you can watch them queue up, print, and clear, or cancel one that's misbehaving.
On iPhone and iPad, you can add the Print Center to your Control Center so it's always one tap away:
- Open Control Center by swiping down from the top-right corner of the screen.
- Press and hold any empty area (or tap the + in the top-left) to enter edit mode, then tap Add a Control.
- Search for Print Center and tap it to add it to your Control Center, then tap anywhere outside to save.
- Now, whenever you want to check your jobs, open Control Center and tap the Print Center control to see what's currently printing and what's queued.
Note: the Print Center only shows jobs while something is actively printing, so it's most useful to check right after you tap print.
As an Amazon Associate, we earn from qualifying purchases.